 "Josh Welton" (watchtheprettylight)
08/28/2013 at 13:43 • Filed to: welding, brown dog welding, weldporn, tips, weldlopnik, walking the cup, fabrication, tig, pipe
 4
4
 7
7
 "Josh Welton" (watchtheprettylight)
08/28/2013 at 13:43 • Filed to: welding, brown dog welding, weldporn, tips, weldlopnik, walking the cup, fabrication, tig, pipe |  4 4
|  7 7 |

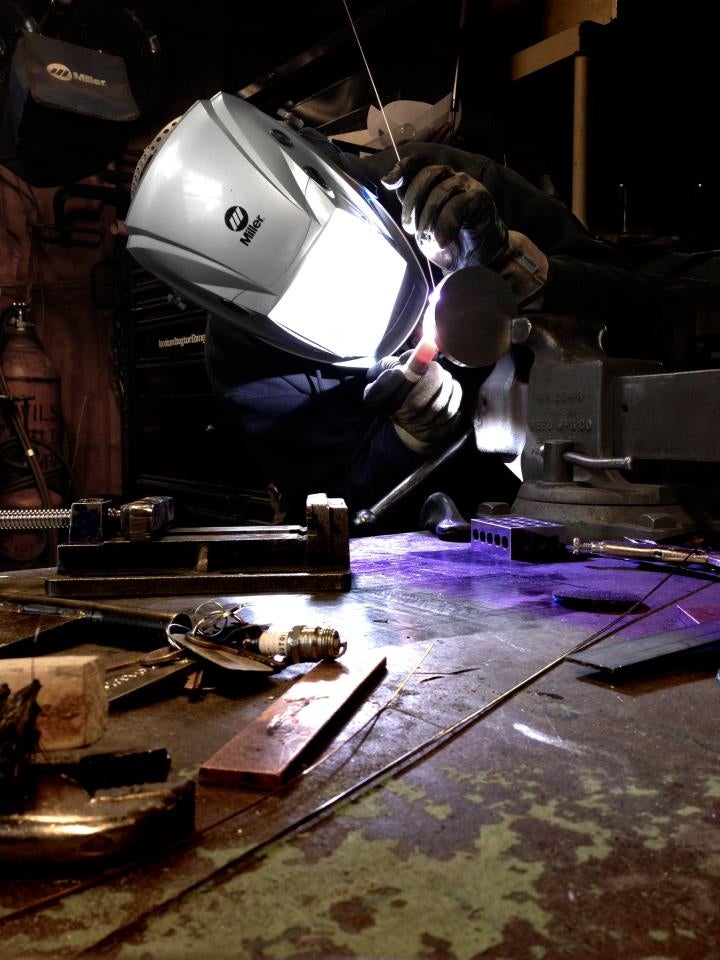
I get a ton of questions about "walking the cup" specifically and "weaved" welds in general. For the most part I walk the cup or freehand weave for fun, to stay sharp... in my line of work I rarely(occasionally, but not often) encounter the need to do it. When I was at Chrysler and I did the tig !!!error: Indecipherable SUB-paragraph formatting!!! test, I did walk the cup from the root to the cover pass. It's the go to technique for tig pipe welding, and not because it looks cool; it's a fast and efficient way to dump a bunch of filler into a joint with a tig torch. DISCLAIMER: I'm not a boiler maker, I'm not a pipe welder; those guys, the ones that do this day in and day out, are the masters. I'm not the end all be all expert on the subject. But I get asked enough about certain aspects of it that I'll share some of what I've learned and figured out over the years. If you're uncertain about terms, ask.
To start with, it's ideal for joining an open root v-groove( !!!error: Indecipherable SUB-paragraph formatting!!! ). Everyone's style is a little different, and everyone sets up their joints a little differently, so this description will be a little generic. For the root I like to use a cup that will sit just inside the groove( !!!error: Indecipherable SUB-paragraph formatting!!! ), I'll have the tip of the tungsten just above the root opening, and I'll lay wire . I'll try to use a filler rod that's big enough to sit above the lands without falling through the root....and at that point it's just too easy. Moving the cup by rocking it side to side, keeping the arc focusing in the root area(basically land to land), you can go quickly and you'll get a bead that's perfect on the backside of the joint as well as the face.
I don't actually get asked about that part too often, but I wanted to put it out there because it's critical. It's "the" way to weld an open root pass.
Most of the questions I get are on the cover passes, or the fillet welds. You know....cuz it looks cool. Do I pulse the pedal or keep the amps steady, do a I lay wire or dip, am I walking the cup or free handing the torch? All in the interest of achieving a certain look. Well, the answer to all three questions is "both".
A cover pass on pipe, to get it to look nice, flat, symmetrical, and clean, is the most difficult weld for me. You're constantly changing the angle of both the filler and the torch. Unlike a groove or a fillet joint, there is only one surface to rest the cup on, so you're using the front edge of the cup as a fulcrum. Balance can be difficult, to the point where I know some welders will freehand the cover weave or run stringers as opposed to walking the cup. The root and the filler passes on pipe are pretty much cake, so for cover practice I'll sometimes just take a pipe and scribe a couple of lines to simulate the groove edges. It's actually more difficult because there is no groove or physical edge for the filler to flow in to, so it's very helpful for practicing puddle control.
!!! UNKNOWN CONTENT TYPE !!!
These are usually done by laying the wire and slightly feeding it into the puddle to maintain it's profile. Sometimes I'll roll the wire with the puddle, other times I'll dip it from side to side. You can mess around with different sizes of rod, or even doubling the rod up as well.
(on a "real" pipe weld, the pass before the cover I'll get as close to the edges of the groove without burning them out and as flush to the surface of the pipe without going over. This will give you the ability to build a nice, even, just above flush cover on the last pass)
On the fillets, I'll typically run a "root" pass first. You can still walk it, but it will be a small bead penetrating where the two pieces of metal come together:
!!! UNKNOWN CONTENT TYPE !!!
Usually on the root pass I'll lay the rod; the trick is to keeping it on the leading edge of the puddle. If you pull it a way a bit too far, the tip of the rod may ball up. If you're pushing it into the puddle, you'll create a larger bead that will be too concave or won't penetrate enough. You want to find a happy medium for a consistently sized weld that digs into the base material.
Now for the passes over that, the technique you use is what impacts the appearance of the bead. Remember that the pattern of the weld is caused by the way the puddle "freezes." Different things effect the temperature of the puddle. Amp input is the obvious one, but another less obvious factor is that adding filler sucks away heat....so if you're dipping the rod, there's a more noticeable ripple than if you're laying wire. Speed and material thickness can also have an effect.
!!! UNKNOWN CONTENT TYPE !!!
!!! UNKNOWN CONTENT TYPE !!!
The above welds were done walking the cup. Sometimes that isn't an option, whether it's space constraints or the procedure won't allow the cup to touch the work. In that case it's good to be able to do a freehand weave as well. It's possible to get welds to look just as consistent as you get from walking, but it's definitely not as easy. Actually, the concept of doing it freehand is probably easier; you're just doing the motions with your hands, fingers and wrist, there's no need for balancing and leveraging your cup on the material. The execution, however, is a bit more difficult to do with consistent results.
!!! UNKNOWN CONTENT TYPE !!!
It's doable with aluminum too(these are free hand):
!!! UNKNOWN CONTENT TYPE !!!
I remember seeing a pipe section that was on display in one of my first welding classes at the training center, it had been tigged by a guy that placed top 5 in a world welding competition. Straight walking the cup all the way around. Instructors described him as a machine. I wanted to duplicate that pipe, then be better than that pipe. I remember seeing a picture of a weld !!!error: Indecipherable SUB-paragraph formatting!!! did on a hot rod frame with a freehand weave pattern, and I worked to see how I could emulate that. I'd see welds that pipe fitters would post of their nuke cert welds, and I'd try that to discover their technique. Often I'll find something that works while I'm just laying beads and practicing, and I'll fine tune it. Nothing beats inspiration and hood time.
!!!error: Indecipherable SUB-paragraph formatting!!! , but it's the only way to reach your ceiling.
 Laird Andrew Neby Bradleigh
> Josh Welton
08/28/2013 at 13:51 |
|
This should have a NSFW tag, because this is PORN mate.
Edit: I accidentally a letter
 desertdog5051
> Josh Welton
08/28/2013 at 14:03 |
|
Fricking beautiful work. Learning from every post. Thanks.
 pdthedeuce
> Josh Welton
08/28/2013 at 14:25 |
|
'scuse me , gotta change pants...
 Formula4speed
> Josh Welton
08/28/2013 at 14:27 |
|
I wish I could do anything this well. Literally anything at all. I wish I could poop with this much accuracy, precision, and artistic flair.
 doodon2whls
> Josh Welton
08/28/2013 at 16:25 |
|
As always, I am in awe of the weld porn you produce... There has to be a market for this kind of precision manual welding, no ? Since much of the volume production mfg has gone the way of the robot, prototype shops would have to be the place...
Hey-Zeus, man... Your weld-work is beautiful...
 Josh Welton
> doodon2whls
08/28/2013 at 18:27 |
|
Thanks!
There is a market for highly skilled tig weldors. I'm looking to test that statement in a few months when I get this next surgery taken care of.
 webmonkees
> Josh Welton
03/19/2014 at 20:26 |
|

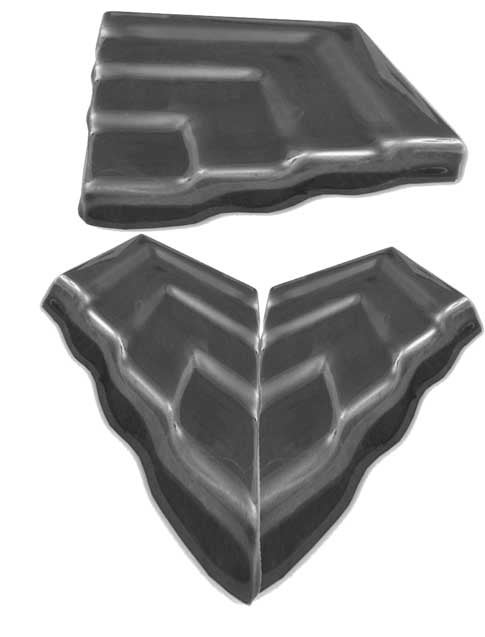
Is this fantasy illustration a plausible corner 'design'?
Kind of evoking a spider web,
Second is taking the same layering concept but with a valley, joined with a middle seam. I am not a proper welder, but doesn't stop me from designing over my skillset.
Thanks for sharing, and apologies if this sounds like utter gibberish.